Saturday, July 23, 2011

Last Week and Next Week (PA Bot Blast and Otakon)

Finally, a weekend where I am not rushing about to see new places or compete against other sentient beings. However I have stuffs to prepare for next week so after 7 hours of straight soldering, I elect to type up a post while I am still on a solder fume high (no not really).

Made the drive from Maryland to Pennsylvania for my first ever PA Bot Blast event! Driving up to Harrisburg in the wee hours of the morning but when I started up the road to Bloomsburg things sudden looked very hilly and untouched. Towns built into the valleys of the massive hills, which were covered with trees; to be honest I felt like I was in a northeastern Costa Rica. 7 halves hours later I arrived at the Columbia Mall and prepared to set up.

I brought P150, DDT, and Cake to represent the south. I hadn't really run these robots since April, so I assumed they were in working order. Boy was I in for disappointment. P150 and DDT both went 1W:2L for seemingly dumb reasons. They both lost wheels in their first matches. P150's was removed by hedgehog's angled cutter (and P150's poor control), and DDT's seem to have fallen off by chance (when Fangus and DDT hit, he popped the belt off the pulley, jamming the blade and spinning the robot, which threw the wheel off. If Fangus was the cause, my shaft would be missing). They then proceeded to defeat robots in their expected fashion only to lose again disappointingly. Some additional thought needs to be put into these robots.

Cake made a wonderful representation! 4 wins and 2 losses, both losses caused by One Fierce Lawn Boy from Fierce Robots. Every match ending up in KO. Videos below.


The money shot of the event. The final hit between Ripto and Cake in the loser's finals match resulted in Ripto being lodged between the lexan and the outer barrier. Ouch.


Jeremy ran a very professional event. Organized procedures, match listings, and even had clarifications for the grey areas of robotic combat. Needless to say, I'll be returning if I am in the area again!

PA Bot Blast 2011 Album


Next week will be Otakon, the largely anime convention in the Baltimore area. Now, I am not a huge fan of anime, but I do like to create. I had my Tony Stark, Iron Man costume shipped up to me during Independence Day break so I could work on it. A few upgrades ensued.

First I decided to add a blue tint to my LEDs. Feeling resourceful, I merely took a marker and drew on the outer surface. Nothing fancy.


The other upgrades were all for my sanity. I redid the wiring to be much more robust and clean. At Dragon Con, I had several problems with connections breaking and repairs required. This time, all solder joints were solid, shrinkwrapped, and glued.

Tuesday, July 12, 2011

Textual Updates

It is a loosely kept secret that I am not currently residing in Florida or Georgia this summer. As a result, summer term creativity has been pretty mute.

Some might call it slacking. I've reacquainted myself with Team Fortress 2 and all the hat(in)sanity. I've also been experimenting with this new Google+ object. Both of which I am proud to say, I HAD IT BEFORE IT BECAME FREE.

Anyway, I've not been slacking. PA Bot Blast will happen this upcoming Saturday and my robots have been ready since April. Each one of them snuggled in their little bubble wrap blankets, suffocated in duct tape. It is time to check on them.

This week I will begin cycling batteries and practice driving. I am confident each robot will put on a spectacular show, but by no means will this be an easy competition. If you are in the PA area, I encourage you to visit the event in Bloomsburg, PA.

http://www.buildersdb.com/eventdetail.asp?eventid=334

In other news, OTAKON! I've registered for an anime convention I felt like attending and so preparations begin! I had Irony Man shipped up to my location so I can work on him. Upgrades are expected. I'll be using a arduino mini instead of the Duemilanove for size and simplicity of power routing (since I can run the mini off 3.3V, and hence require only one cell). I'll also be running some Luxeon super bright LEDs instead of the current modules.

Yeah.

Saturday, May 28, 2011

Enter The Wooden Man

I've been becoming increasingly interested in martial arts every day. I used to practice Northern Praying Mantis in my youth and other than athletics and personal fitness it has not been too useful until I moved to Atlanta. Things are considerably more hostile and the ability to self-defense has become the aspect that keeps me from cowering in fear of the city.

Among the other styles I've seen, I've enjoyed Wing Chun. It is a southern style, that focuses on the speed from economic movements of blocking and attacking simultaneously.

I decided to try and construct a "wooden man" to help facilitate the practice of Wing Chun.
As the name suggests, these are usually made of wooden timbres with other protrusions for the legs and arms. They can be attached to the walls, or solidly implanted into the ground. As a student who travels frequently, I need my wooden man to work, but also be collapsible and light to transport around. Digging holes and hammering on my walls are unacceptable.

So here we go:


PVC body, wooden arms, and a weighted base of water similar to backyard basketball hoops. That way I can fill the base with water to add weight, and empty it between travels. The PVC construction is significantly lighter than a 9" diameter chunk of wood, but should offer enough rigidity to take impacts. Right now those are 4" PVC pipes, but I can add padding to thicken them, or use larger tube if i know they are available.

But the key features are present. The arms and legs are removable, and the base is separable into two parts to facilitate packing all the while being light.

A major determining factor will be the mating parts for the water base. I don't actually have one, so I need to first find one I can dismantle before finalizing the design.

This will be built when I return to Florida.

Sunday, May 15, 2011

Supermassive Updates

I neglected updating the blog for awhile due to life, but I promise this post has some good content. First, the summary:
  • P0w3r Drive
  • PA Bot Blast Preparations
Last time I assembled the endcaps to find they were wobbly by not-so infinitesimal amounts. Did I re-machine them? You bet. But this time I implemented a different technique.

You might recall, the technique I have been using to machine the endcaps was to first rough cut a disk of aluminum on the waterjet and then turn the parts on the lathe using a socket cap bolt through the center. I believed the source of the issue same from wiggle room between the starting bore in the waterjet plate and the OD of the bolt (since drill bits increase in discrete amounts not necessarily tuned to bold diameters).

So this time, I decided to apply some angular principles of self-centering. I angled the bore by using a countersink bit. Furthermore, I grabbed the appropriate flat screws for the duty and a hexagonal standoff for the opposite end. It basically worked like V-groove stands for machining tubes. The round object is guaranteed to sit in the center of the groove. Works similarly for the conical shape. This method returned a much truer endcap, and validates the technique.


Also, automatic feeds are AMAZING. Almost a mirror finish. Never before have I turned such a smooth part.


I was only able to finish one end before the term ended, so there is no way I will be able to test the wheelmotor this summer. What I can do, is wind the stator. More on that in about 12-14 weeks.

In other news, I'm finally going to fight robots again! Dreadfully Wicked Robots is hosting PA Bot Blast in the Bloomsberg Mall. Features robots from 150 grams to 6 pounds. Heavens know I don't have a 6lber, but I do have the insect fleet.

I will be taking DDT, Cake, and P150.

Wait, p150? isn't he dead? Yeah, kind of. But he can be rebuilt... better... faster... stronger...


...and more carbon-y. Seriously, lets use some of these resources I have at the Invention Studio to make some grade-A bots. P150v4 uses the old 7.4, 300mah lipoly and Jeti advance 4 esc but everything else is new. 30:1 micro sanyos, Turnigy 2204 brushless motor, HMC 3-9 single channel escs, and Spektrum AR-2 gram receiver.


Waterjetted the carbon fiber plates. Surprisingly I didnt have to use fodder plates to prevent the delamination. I just used a large lead-in, and low-pressure settings. There was some delam happening around the frame, but nothing superduper glue could fill in.


I had a moment of boredom while it was raining and decided to try engraving on Carbon Fiber. It won't cut but instead seems to melt the epoxy a bit. I guess an experience not to be repeated.


Wiring the beast is hell. I made a minor design change on the fly. Originally the robot was to use .5" standoffs to space the innards, but I opted for .375" because the motor would have required a massive hub to make up the height deficit. As a result, everything was 2x crammed in the fuselage. I had to buy the spektrum AR-whatever 2 gram receiver with the micro JST plugs to make it fit.


STILL I had to remove the micro JSTs and direct solder. [note to users: spektrum decided to be crafty and switched the positions of the 5v+ and gnd on this receiver. BE WARNED]

The HMC3-9's were angled (WTF) and flipped to fit. Only one superbus was used for power.

Somehow, it all fit.


After turning down the wheels from 1.5" to 1.125", I finished the bore on some old Vrogy blades Seth Carr of Team Lab Rat graciously donated/sold cheaply.


Bam. A robot. I added and bent some strips of grade-5 titanium to bring it up to weight and add protection. It looks very similar to Wazio's Pookie if anyone remembers that being built. Eitherway, it performs like a champ. Gryos like crazy, quicker than any version of P150, can rip through 1/32" steel like frozen butter.

Minor tune ups were made to the other robots as necessary. DDT required no additional servicing (as usual), Cake was lubricated and modified to include mechanical locks on the drum shaft instead of set screws (because setscrews suck), and P150 was rebuilt as noted above. I am concerned for the needle roller bearings in Cake because I was unable to remake the shaft so there is some audible play in the shaft. Could damage the rollers, so I'll bring the old drum as a back up.

PA Bot Blast on July. Cheers!

Also, Cheesecake.

Thursday, March 24, 2011

p0w3r Drive: Cut.

Mad rush to get the wheel spinning before Spring Break. It is Spring Break now, was I successful?

...haha.

First operation was machining of the endcaps as discussed in the previous post.


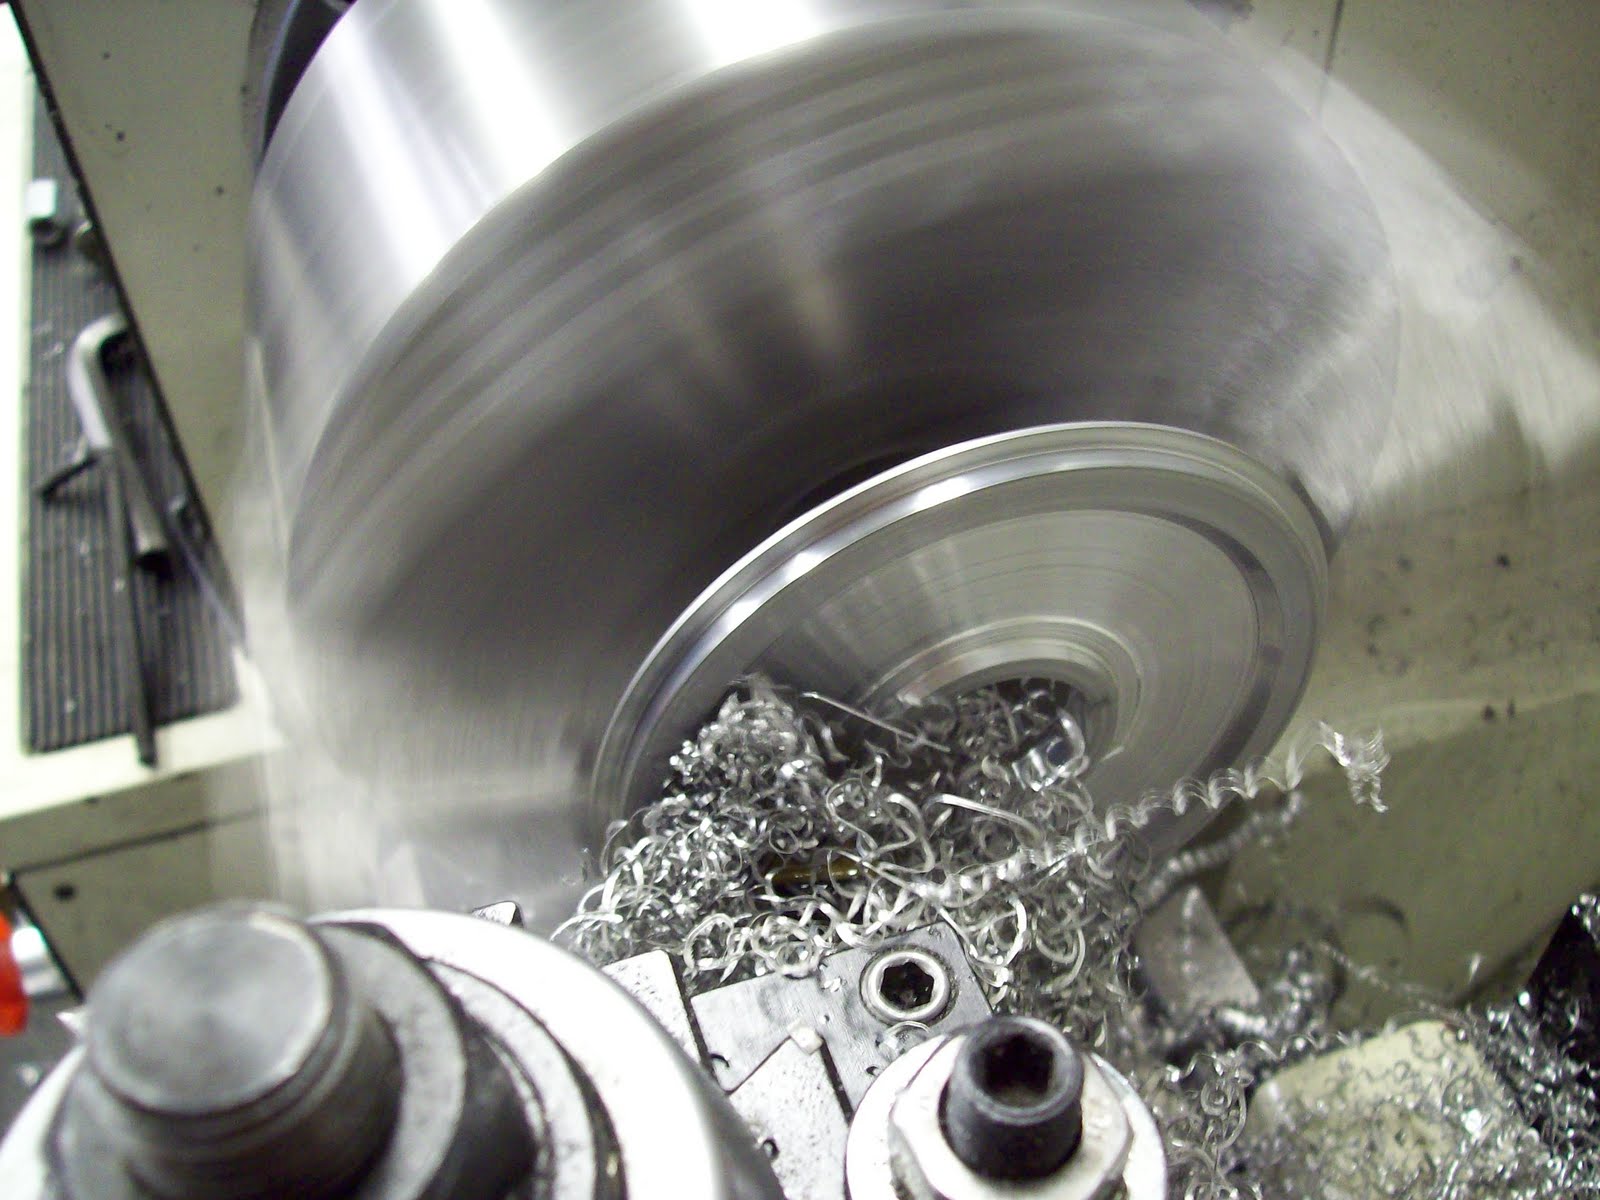
Mounted to the lathe through a 5/16-18 cap screw and a copious number of hex nuts. Spun counter-clockwise at about 200 rpms for something that large in diameter.


Resulting part. Pretty shiny on all surfaces touched by the cutter. I did notice some wobble produced from radial play between the cap screw and the inner bore of the plate. This must have been what Shane was talking about. We will see if this proved troublesome enough to require correction, but considering the history of this project (v1 - v2 rebuild), I'll probably end up making new ones out of frustration.


The build is progressing very well so far! All components considered, it weighs just over two pounds, which is 2x lighter than the current kollemorgen system on my scooter. Speaking of which...

Stupid things to do on an electric scooter:


Part 2 to follow.

Sunday, March 13, 2011

p0w3r Drive: Sexy Things that Spin

Believe it or not, but I am halfway through revision 2 of the hubmotor. You ask, "what happened to the first version?"

Simple answer: I got lazy and the aesthetics bothered me. I mean, the motor was 1.625" wide, with only 1" of filleted tread. The 1/4" endcaps looked bulky and unattractive but I couldn't add an edge chamfer because the inner diameter features were already finished. Additionally, I neglected to add sufficient wiggle gap to the magnet ring rings, which made it extremely difficult to get the magnets in place. One formerly excited afternoon transformed into a painfully disappointing sanding feat. Once I had ONE magnet in the spacers, I knew that this was not worth the effort.

So with all these changes to be implemented, I elected to simply not finish version 1. Here is version 2: incredibly badass and sexy.


The wheel is now only 1.25" wide, with a 1.5" hubshaft (more wire space, finally!). I will still be using 1/4" endcaps, but I will turn down the edges and internal features so I can sink the endcaps further into the wheel. This also allows me to rid of the polycarbonate spacers, which served no purpose whatsoever. The mechanical lock nubs were replaced with precision eyeball machining aka I will be relying on a frictional fit from the endcaps and the OD of the magnet ring. This might seem like a bad idea, but It is better than trying to use 4-40's to lock the wheel and any slipping might act as a neat clutch feature. I also added .016" of space to the magnet gap so the magnets just drop in. No file work required.

To make the endcap features, I will be adopting a trick I learned from Shane Colton. First, machining will begin with a waterjet rough circle cut. A severely undersized internal bore and the seven through-bolt holes made. The bore will have a capscrew through it, accompanied with several nuts. These nuts will then be clamped in the chuck of the lathe, and all outer features will be finished. Thereafter, the bolts will be removed, and the bore will be opened with a boring bar. More work certainly, but I expect a much finer product.

Monday, March 7, 2011

InVenture Prize: Final Run!

This week is the finals round of the InVenture Prize!


Not much to say here except...

... COME TO THE EVENT! It will be held at the Ferst Center for the Arts on the Georgia Tech campus, at 6:30. Come early, get better seating.

Here's a Facebook event:
http://www.facebook.com/event.php?eid=167796909938807#!/event.php?eid=167796909938807

I am told it will be streamed live here:
http://www.gpb.org/inventure

Come please!